Elastic IPs
All Exoscale instances include a native IPv4 address leased from a global pool. This address is strongly coupled to the Compute instance itself: when you destroy the instance, you release the IP address to the global pool with no guarantee that you will ever get the same IP address again.
There are various cases where you may want an IP address to persist, however. By creating an Elastic IP, you can have a specific IP address for your organization. You can then attach it to one or several instances in addition to their native IP address.
The simplest use case for this feature is to use an Elastic IP as a persistent IP address you can move between instances. This allows you to circumvent the IP address change on destroying an instance. With an Elastic IP, you can switch the underlying instance and point traffic to the same address all the time.
Another possible use case would be having the need for several IP addresses on the same machine, such as to use multiple TLS certificates, or run several instances of the same service.
Elastic IP Types
Elastic IPs come in two management types:
- Manual
- Managed
By default, both have the same basic behavior:
- Elastic IPs are created for your organization. An Elastic IP will be available until you decide to delete it.
- Elastic IPs can be attached to one or multiple instances at any time.
- Elastic IPs are bound to a zone. Elastic IPs can only be attached to Compute instances in the same zone.
- All incoming traffic towards an Elastic IP is redirected to the attached instances.
- All outgoing traffic is still sent by the internal IP address attached to the instance itself: it will not be seen as coming from the Elastic IP.
- When multiple instances are attached to an Elastic IP, traffic aimed at the Elastic IP is distributed to those attached instances with no even load distribution guarantee.
On top of all this, both manual and managed Elastic IPs have distinct characteristics. Their behavior can also be customized.
Managed Elastic IP
Managed Elastic IPs require no action from your side on the instance itself. After a managed Elastic IP is attached to an instance, it transparently routes traffic to the instance. Moreover, a managed Elastic IP has some basic health check capabilities, routing traffic only to healthy instances. However, note that:
- Instances attached to a managed Elastic IP see incoming traffic as if it is coming from the native IP address. This means you cannot differentiate traffic based on the target IP.
- Outgoing traffic will always originate from the native IP address, in contrast to manual Elastic IPs.
Manual Elastic IP
Manual Elastic IPs need to be manually enabled on the instance. This management type allows for more flexibility, but requires more manual configuration. Distinct characteristics of manual Elastic IPs include:
- Internally, instances attached to a manual Elastic IP see traffic coming to the Elastic IP address. This differs from managed Elastic IPs, where incoming traffic is seen as coming to the native IP address of the attached instance.
- Instances attached to a manual Elastic IP can use it as a source for outgoing traffic, with some limitations.
Creating an Elastic IP
You can create an Elastic IP through the Portal, the CLI or the API.
This is an example from the CLI:
# Create a manual Elastic IP
$ exo compute elastic-ip create --zone de-fra-1
 ✔ Creating Elastic IP... 3s
┼─────────────┼──────────────────────────────────────┼
│ ELASTIC IP  │                                      │
┼─────────────┼──────────────────────────────────────┼
│ ID          │ 5a5aed48-7a46-442a-8456-0a15d931fd0b │
│ IP Address  │ 203.0.113.202                        │
│ Description │                                      │
│ Zone        │ de-fra-1                             │
│ Type        │ manual                               │
┼─────────────┼──────────────────────────────────────┼

# Create a managed Elastic IP
$ exo compute elastic-ip create  \
  --zone de-fra-1                \
  --healthcheck-interval 60      \
  --healthcheck-mode tcp         \
  --healthcheck-port 80          \
  --healthcheck-strikes-fail 5   \
  --healthcheck-strikes-ok 5     \
  --healthcheck-timeout 10
 ✔ Creating Elastic IP... 3s
┼──────────────────────────┼──────────────────────────────────────┼
│        ELASTIC IP        │                                      │
┼──────────────────────────┼──────────────────────────────────────┼
│ ID                       │ 868d029d-b1a2-4fd3-9006-4b98998240b4 │
│ IP Address               │ 203.0.113.203                        │
│ Description              │                                      │
│ Zone                     │ de-fra-1                             │
│ Type                     │ managed                              │
│ Healthcheck Mode         │ tcp                                  │
│ Healthcheck Port         │ 80                                   │
│ Healthcheck Interval     │ 1m0s                                 │
│ Healthcheck Timeout      │ 10s                                  │
│ Healthcheck Strikes OK   │ 5                                    │
│ Healthcheck Strikes Fail │ 5                                    │
┼──────────────────────────┼──────────────────────────────────────┼
Note that in order to create a managed Elastic IP, you have to provide health check parameters. Without those parameters, the Elastic IP is created as manual management type.
Attach an Elastic IP to a Compute instance
Once the Elastic IP address as been created, you can attach it to one or more Compute instances. Here is another example from the CLI:
$ exo compute instance elastic-ip attach my-instance 203.0.113.202
 ✔ Attaching Elastic IP "203.0.113.202" to instance "my-instance"... 3s
┼──────────────────────┼──────────────────────────────────────┼
│   COMPUTE INSTANCE   │                                      │
┼──────────────────────┼──────────────────────────────────────┼
│ ID                   │ 0e713d4c-9f3f-4a9a-b958-b4571450d3a8 │
│ Name                 │ my-instance                          │
│ Creation Date        │ 2019-03-08 15:07:14 +0000 UTC        │
│ Instance Type        │ standard.tiny                        │
│ Template             │ Linux Ubuntu 18.04 LTS 64-bit        │
│ Zone                 │ ch-gva-2                             │
│ Anti-Affinity Groups │ n/a                                  │
│ Security Groups      │ default                              │
│ Private Networks     │ n/a                                  │
│ Elastic IPs          │ 203.0.113.202                        │
│ IP Address           │ 203.0.113.20                         │
│ IPv6 Address         │ 2001:db8:e00:588:4fe:9cef:fe00:23f   │
│ SSH Key              │ admin                                │
│ Disk Size            │ 10 GiB                               │
│ State                │ running                              │
│ Labels               │ n/a                                  │
┼──────────────────────┼──────────────────────────────────────┼
The Elastic IP is now routing traffic to my-instance.
After an Elastic IP is attached to an instance, a managed Elastic IP does not require explicitly configuring an extra network interface on the instance. However, a manual Elastic IP requires some further configuration.
Managed Elastic IP Health Check Options
Managed Elastic IPs have an integrated health check. The health check will periodically run on the attached instances in order to prevent sending ingress traffic to an instance that is unable to receive it for various reasons, such as during maintenance or a crash.
The health check can be configured in one of the following modes:
- TCP: check that a TCP connection can be successfully established on a given port.
- HTTP: check that an HTTP request can be successfully performed on a given port and URL path. HTTP checks are considered failed if the response status code is equal or greater than 400. Redirects are not followed.
In either mode, you can further configure the following parameters:
- Interval: the time in seconds to wait between two health check tests (default: 10s)
- Timeout: the time in seconds after which an unresponsive health check test is considered failed (default: 2s)
- Strikes Fail: the minimum number of failed tests before considering an instance unhealthy (default: 3)
- Strikes OK: the minimum number of successful tests before considering an instance healthy (default: 2)
Note
It is not currently possible to retrieve the health status of an instance. While the system will not direct traffic to an unhealthy instance, the internal state of attached instances is not exposed.
Configure a Manual Elastic IP on an instance
Manual Elastic IPs require additional configuration on the target instance for that instance to receive traffic.
Warning
The Elastic IP address is set up as an additional IP address for your instance. The original IP address will still work, as it is used for outgoing connections. Do not remove the original IP address of the instance as the Elastic IP will not work without it. Several other native functionalities will also break.
The operations and commands to be performed vary depending on your chosen template. Below are a few examples for different templates:
Ubuntu Bionic
In /etc/netplan/51-eip.yaml, put the following snippet.
network:
  version: 2
  renderer: networkd
  ethernets:
    lo:
      match:
        name: lo
      addresses:
        - 203.0.113.202/32
And then, apply it: sudo netplan apply
Debian or Ubuntu (Xenial and lower)
In /etc/network/interfaces.d/eip.cfg, add the following snippet:
auto lo:1
iface lo:1 inet static
    address 203.0.113.202/32
Then, use ifup lo:1 to enable the Elastic IP. It will also be enabled
automatically on boot. From here, you should be able to ping your
instance and any service authorized in the associated security group
should be reachable with this Elastic IP as well.
If you need to add any additional Elastic IPs, use lo:2, lo:3, et cetera.
On Debian 8, you have to add source /etc/network/interfaces.d/* in
your /etc/network/interfaces.
CentOS
Create a /etc/sysconfig/network-scripts/ifcfg-lo:1 file with the
following content:
DEVICE=lo:1
IPADDR=203.0.113.202
NETMASK=255.255.255.255
ONBOOT=yes
NAME=lo1
Then, use ifup lo:1 to enable the Elastic IP. It will also be enabled
automatically on boot. You should be able to ping the Elastic IP address and
any service authorized in the associated security group should be
reachable with this Elastic IP as well.
If you need to add any additional Elastic IPs, use lo:2, lo:3, et cetera.
CoreOS
Create the configuration file for loopback interface ‘/etc/systemd/network/loopback-alias.network’, with the following content:
[Match]
Name=lo

[Network]

[Address]
Label=lo:1
Address=203.0.113.202/32
Ensure that systemd-networkd is enable:
sudo systemctl enable systemd-networkd.service
To apply the configuration, run sudo systemctl restart systemd-networkd
to restart. It will also be enabled automatically on boot. You can now ping the
Elastic IP address and any service authorized in the associated Security Group
should be reachable with this Elastic IP as well.
You can add multiple loopback Address blocks.
Other Linux Distributions
You can manually add the Elastic IP address on any Linux Instance with the following command:
ip addr add 203.0.113.202/32 dev lo
Beware: this configuration will be lost if you reboot the instance in absence of some custom automation.
OpenBSD
Configure your Elastic IP with this single command:
echo inet 203.0.113.202/32 > /etc/hostname.lo1
You can reconfigure your network on the fly with:
sh /etc/netstart
Since OpenBSD 6.7, it is now required to enable IP routing. This can be done
with the command sysctl:
sysctl net.inet.ip.forwarding=1

# To persist the change upon reboot
echo net.inet.ip.forwarding=1 >> /etc/sysctl.conf
Windows
As a first step, we need to install a special driver for the hardware wizard. Open a command line and execute the following command:
hdwwiz
You should get the Add Hardware Wizard:
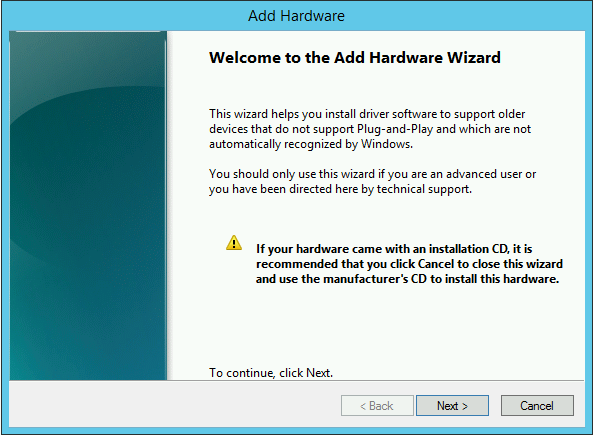
Click on Next. On the next screen, choose the Install the hardware that I manually select from a list:
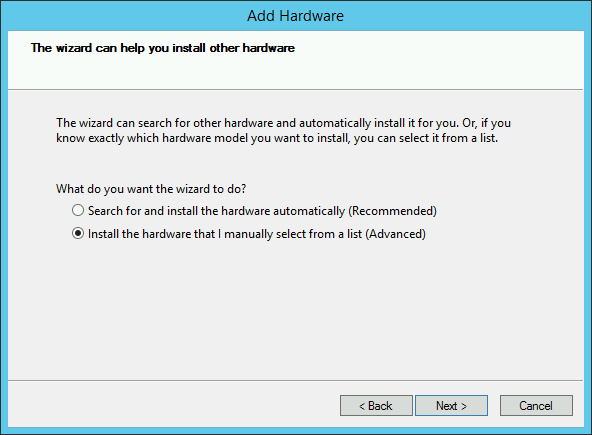
Click on Next. On the next screen, choose Network adapters:

Click on Next. On the next screen, choose Microsoft in the list on the left-hand side, then Microsoft KM-TEST Loopback Adapter in the list on the right-hand side:
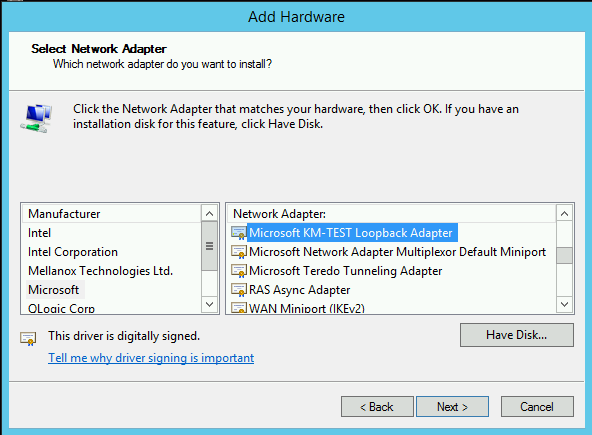
click on Next, then click on Install.
The following steps will assign the EIP to the Loopback interface and activate IP Forwarding to the relevant interfaces.
Note
If you don’t have PowerShell on your instance, please try and install it or let us know about it. We will try and provide a different procedure.
Please open your favorite Windows editor and create a file called EIP.ps with the following content:
# Get the EIP in the format XXX.XXX.XXX.XXX/32 from the cli
param(
[string]$EIP
)
# split the address and its mask
$IPAddress=($EIP -split '/' | Select-Object -First 1)
$Mask=($EIP -split '/' | Select-Object -Last 1)
# query http://metadata.exoscale.com/latest/meta-data/local-ipv4 to get the Public IP
$MyPublicIPAddress=(Invoke-WebRequest metadata.exoscale.com/latest/meta-data/local-ipv4).Content.Trim()
# Rename to Loopback
Get-NetAdapter -InterfaceDescription "Microsoft *" | Rename-NetAdapter -NewName "Loopback"
# Configure the EIP
Get-NetAdapter -Name "Loopback" | New-NetIPAddress -IPAddress $IPAddress -PrefixLength $Mask
# Get the Public interface ifIndex
$PublicInterfaceIndex=(Get-NetIPAddress -AddressFamily IPv4 | Where-Object {$_.IPAddress -match $MyPublicIPAddress} | Select-Object InterfaceIndex)
# Get the Loopback interface ifIndex
$LoopbackInterfaceIndex=(Get-NetIPAddress -AddressFamily IPv4 | Where-Object {$_.IPAddress -match $IPAddress} | Select-Object InterfaceIndex)
# Enable Forwarding
Set-NetIPInterface -ifIndex $PublicInterfaceIndex.InterfaceIndex -Forwarding Enable
Set-NetIPInterface -ifIndex $LoopbackInterfaceIndex.InterfaceIndex -Forwarding Enable
# Print the status after the changes
Get-NetIPInterface -AddressFamily IPv4 | select ifIndex,InterfaceAlias,AddressFamily,ConnectionState,Forwarding | Sort-Object -Property IfIndex | Format-Table
Once the file is created you can now add your EIP as follows:
C:\> EIP.ps 203.0.113.203/32
In the same way you can attach multiple EIPs.
Manual Elastic IP as Traffic Source
There are some cases where you may want to use Elastic IP as a source IP address - for example, if you run an SMTP server. It is possible to achieve that with manual Elastic IPs for applications, which allows you to configure their source IP. The traffic emitted in this setup is seen as coming from the Elastic IP address and not from the native IP address.
For instance, with Postfix,
you can add the following line in /etc/postfix/main.cf:
smtp_bind_address = 203.0.113.202
Most software has a similar setting for outgoing connections. Search
for the bind keyword in the documentation.
Warning
Elastic IP addresses should not be shared across multiple traffic-emitting instances, as it will result in asymmetric routing for returning traffic.
Limitations
- Elastic IPs are initially limited to 5 per organization. You can ask for a quota increase in the quotas section of the Portal.
- Instances sharing a common Elastic IP cannot communicate with each other by using the Elastic IP address.
- Elastic IP will natively work only for incoming traffic. Outgoing traffic will still use the native instance’s IP address as a source. This behavior can be partially circumvented manually with manual Elastic IPs.
- Instances associated with a managed Elastic IP will see incoming Elastic IP traffic destined to their primary interface IP address.
- With managed Elastic IPs, it is currently not possible to retrieve the health status of an instance: while the system will not direct traffic to a unhealthy instance, there is no information about which instance is in an unhealthy state.
- HTTP health checks do not follow redirects.